Scheduling
Scheduling is where you roster the people who run your event. You create shifts (optionally tied to an event), set how many staff each one needs, assign people to them, and track clock-in / clock-out on the day.
Where to find it
Open Scheduling from the logistics area of the left navigation
(/t/<slug>/scheduling). The list shows your upcoming shifts — anything with
a start time in the future, newest window first.
The shift list
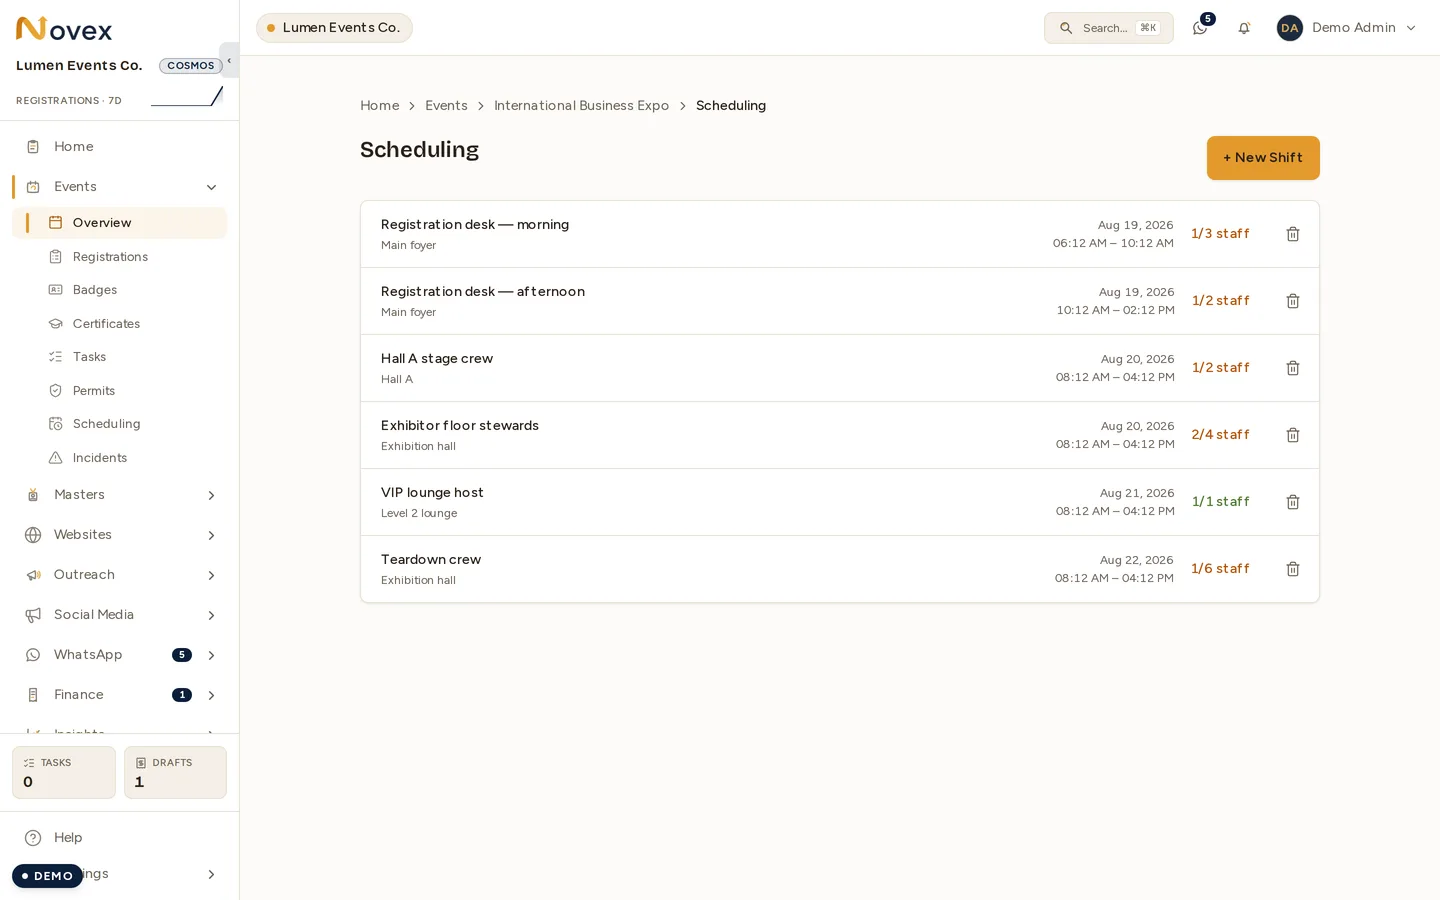
Reached from the event itself, the list is that event’s whole rota. The
n/m staff figure is the count assigned against the count the shift needs;
it reads red until the shift is fully staffed.
Each row shows the shift title, the linked event (if any), the location, the date and start–end time, and a staff-fill count — how many people are assigned against how many the shift requires. The count is colour-coded so gaps stand out at a glance: red when nobody is assigned yet, amber when it’s partly filled, and green once it’s fully staffed.
Create a shift
Choose New shift and fill in:
- Title (required).
- Event — optional; link the shift to an event, or leave it unlinked.
- Start and end (required) — the shift window. The end must be after the start.
- Location — optional, free text.
- Required staff — how many people the shift needs (at least 1; defaults to 1).
- Description — optional notes for the crew.
Assign staff and track time
Open a shift to see its detail page: a status badge, the shift information, and an assignments table. For each person you can record their name, role, and contact, then track their clock-in and clock-out times, edit the assignment, or remove it.
- Shift status moves through Scheduled → In progress → Completed, or Canceled.
- Each assignment carries its own status: Assigned, Accepted, Declined, In progress, Completed, or No-show.
Permissions
Scheduling reuses your Events permissions — there is no separate scheduling role:
events.read— view the schedule and shift details.events.write— create shifts, assign and unassign staff, record clock-in / clock-out, and delete shifts.
It is available on every plan (no plan-tier gate).