Security & sessions
Your security settings let you turn on two-factor authentication and see and control every active sign-in to your account, so you can shut down access from a device you no longer use or no longer trust. Everything here lives under Settings → Security.
Two-factor authentication (2FA)
Novex supports app-based two-factor authentication (TOTP) — the six-digit codes from an authenticator app such as Google Authenticator, 1Password, or Authy. With 2FA on, a stolen password alone isn’t enough to sign in.
Who can turn it on: 2FA is currently an admin control — you need the Admin role (or the manage settings permission) to see the 2FA card. Team members without it see an “admin only” note here. It is set up per user.
Turn 2FA on
- Go to Settings → Security and start 2FA enrollment.
- Novex shows a QR code — scan it in your authenticator app. (You can also type the shown secret in manually if you can’t scan.)
- Your app starts generating a fresh six-digit code every 30 seconds.
- Enter the current code back in Novex to confirm. Once it matches, 2FA is on.
You can cancel before confirming — that discards the pending setup and nothing changes.
Turn 2FA off
Disabling 2FA asks for your current account password to confirm it’s really you. Repeated wrong attempts are rate-limited, and both failures and the change itself are written to your audit log.
Keep your authenticator safe. There are no printed backup codes today, so if you lose access to your authenticator app you’ll need an admin to help reset 2FA on your account — don’t remove the app before turning 2FA off.
Active sessions
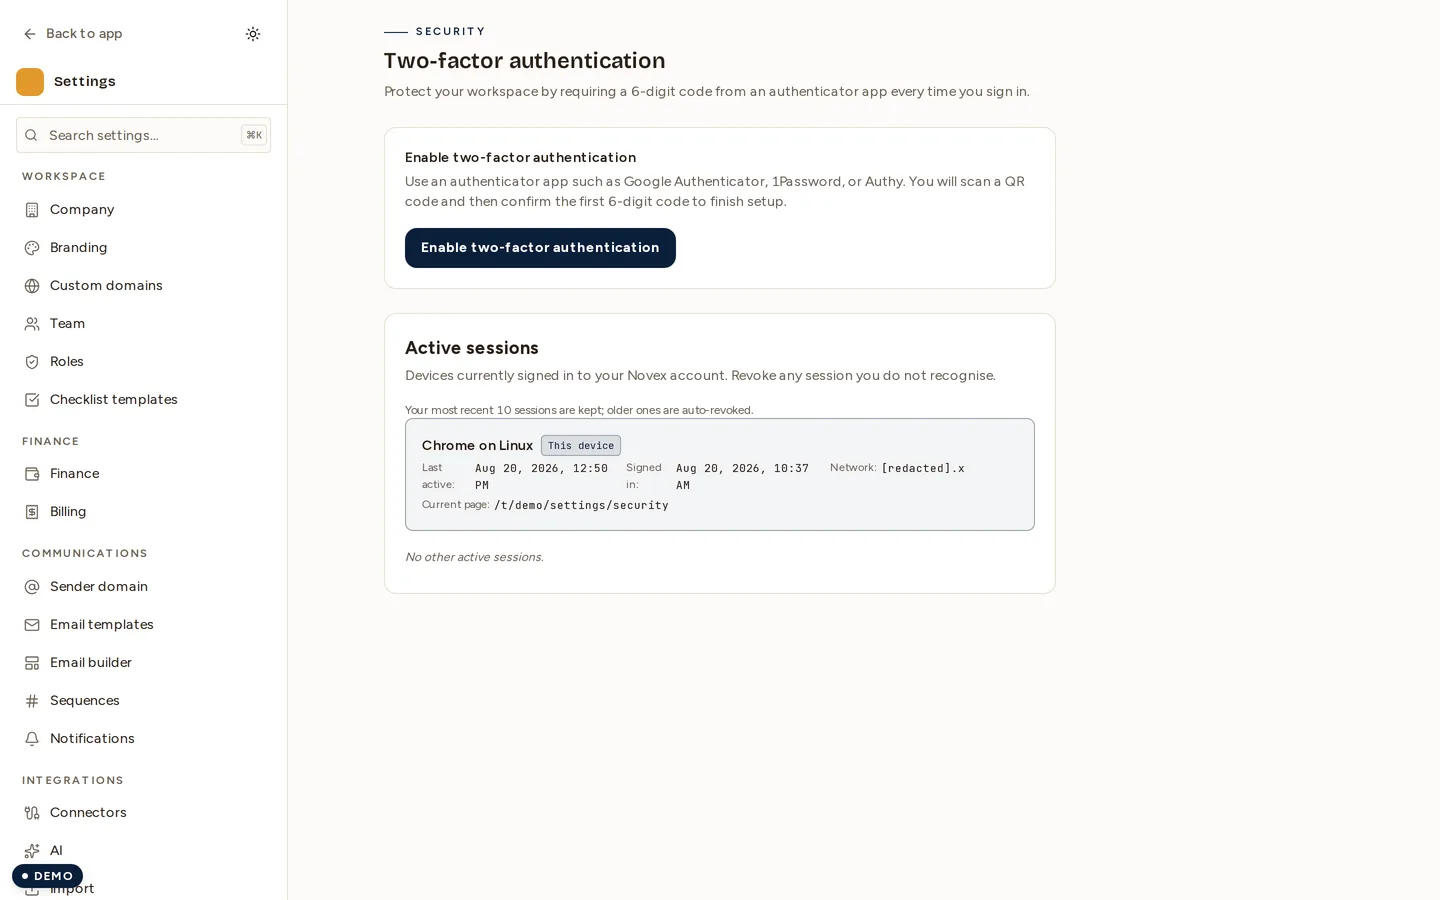
When you sign in to Novex — on a laptop, a phone, or another browser — that creates a session. Settings → Security lists every session that is currently active for your account, so you always know where you are signed in.
For each session you can typically see:
| Detail | What it tells you |
|---|---|
| Device / browser | Which client created the session |
| Location / network | Approximate origin of the sign-in |
| Last active | When the session was last used |
| Current | A marker for the session you are using right now |
Review this list whenever something feels off — an unfamiliar device or location is your signal to act.
Revoke a single session
- Go to Settings → Security.
- Find the session you want to end in the list.
- Click Revoke (or Sign out) on that row.
The targeted session is invalidated immediately and that device is signed out on its next request. Your current session is unaffected.
Sign out everywhere
To end every session at once — useful after losing a device or suspecting your credentials were exposed:
- Go to Settings → Security.
- Click Sign out everywhere (sign out of all sessions).
- Confirm. All sessions are revoked.
You will normally stay signed in on your current device and be prompted to sign in again elsewhere. After signing out everywhere, change your password if you suspect it was compromised.
Tips & limits
- Do this first if a device is lost or stolen — revoking sessions stops access even if the device itself is still unlocked.
- Revocation is server-side, so it cannot be bypassed by the revoked device.
- You stay signed in on each device, phone or computer, for up to 7 days after you sign in, even if you do not use it in between. After 7 days you sign in again. To end a session sooner, revoke it or sign out everywhere.
- Routinely prune sessions you no longer recognise; stale long-lived sessions are a common risk.
- Security-relevant actions are recorded in your audit log for later review.