Embeddable form
You can embed an event’s registration form on your own website instead of sending visitors to the hosted Novex page. The embedded form posts straight into the same registration list.
When to use this
Use the embed when you want registrations to happen in the flow of your own site — on a landing page, a campaign site, or inside your CMS — while still collecting into Novex.
There are two related public surfaces:
- Embedded registration — the event form rendered for embedding via
/r/<tenant-slug>/<event-code>/register/embed. - Standalone form token — a tokenized form URL
(
/f/<tenant-slug>/<form-token>) you can link or frame directly.
How to embed
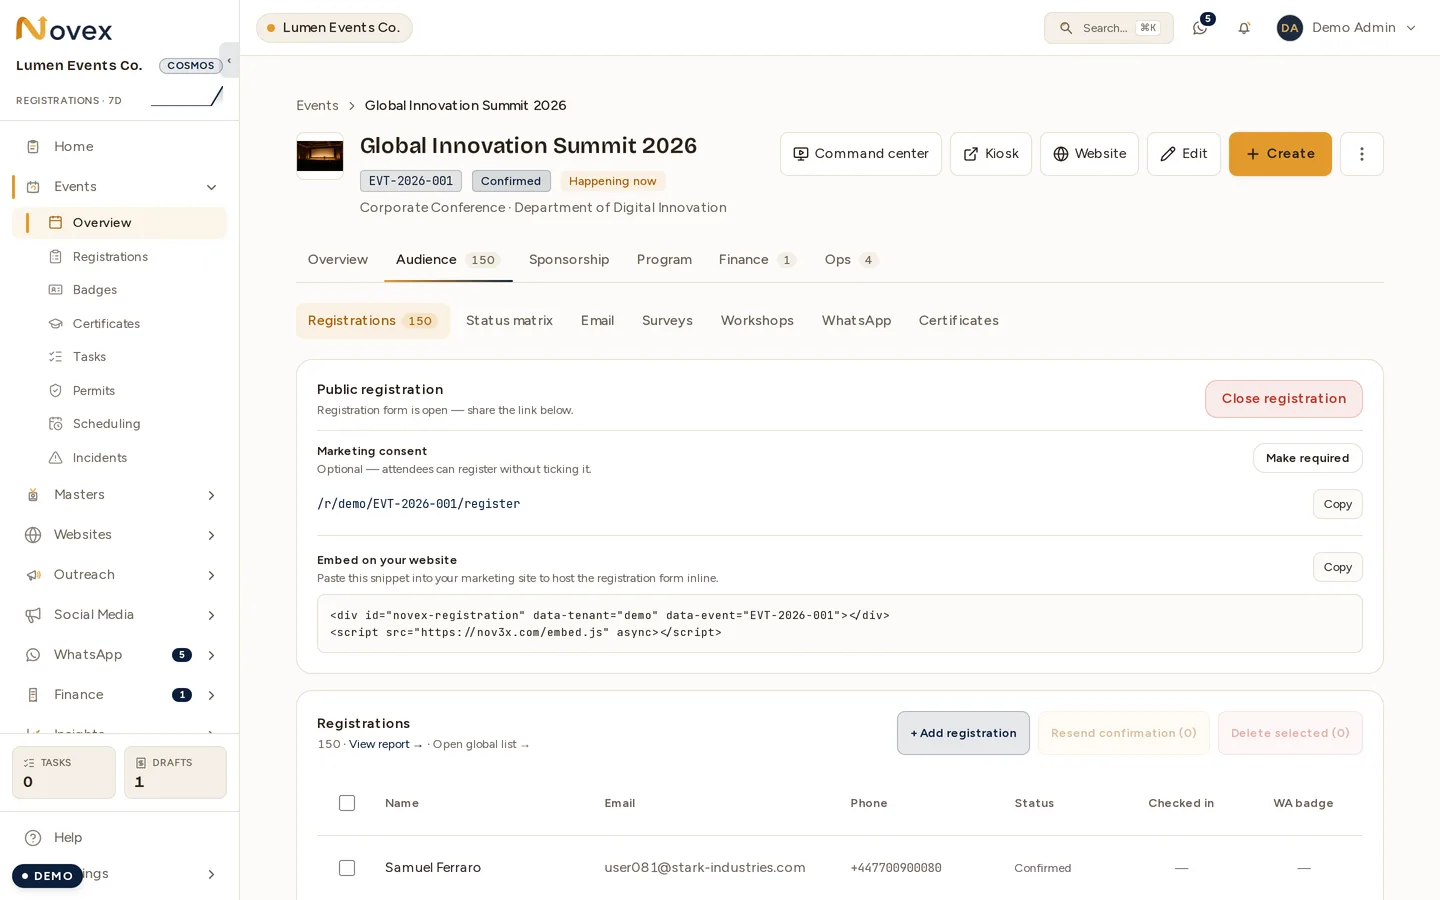
The snippet is a <div> carrying your tenant slug and the event code, plus one
async <script> tag. Copy it from here rather than typing it — the event code
has to match exactly.
- Open the event’s Registration settings and find the Embed option.
- Copy the embed snippet — the
<div>and the<script>line. Both are needed; the script is what renders the form into the div. - Paste it into your website’s HTML where you want the form to appear.
- Publish your page. Submissions appear in Registrations just like hosted sign-ups.
Tips & limits
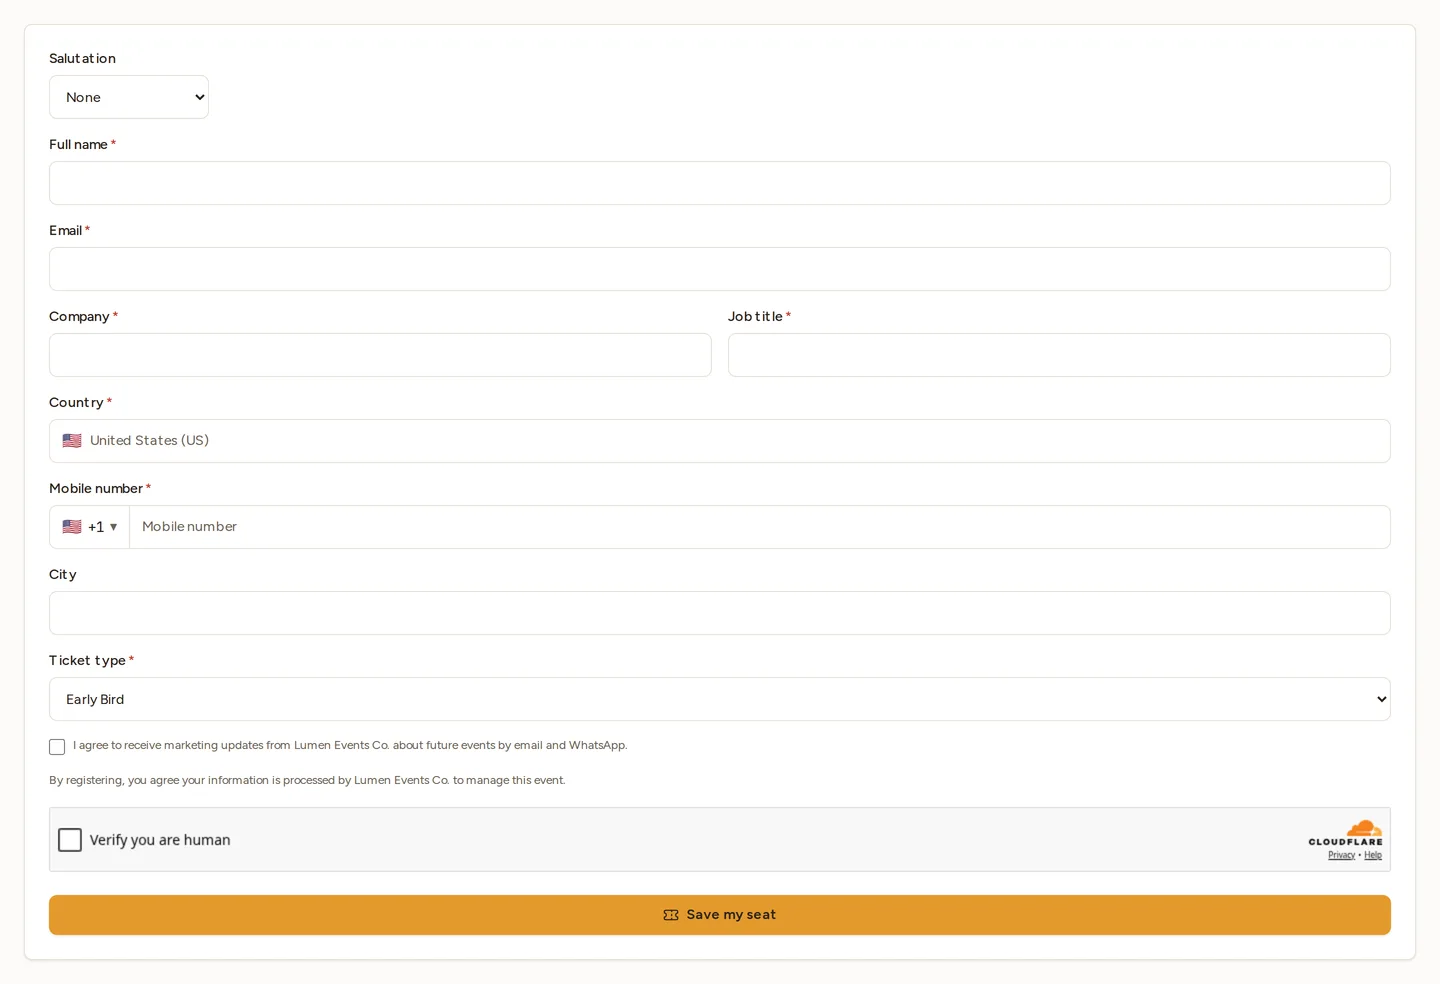
The embedded form renders on its own, with no page chrome around it, so it drops into your layout. It carries the same built-in fields and the same human-verification step as the hosted page.
- Sizing: give the iframe enough height for the longest state of the form (validation messages add height). Test on mobile down to small screens.
- Branding: the embedded form carries your event branding; make sure the surrounding page styling doesn’t clash.
- One form per event: the embed reflects the same fields as the hosted page, so you only maintain the form in one place. The built-in required fields — including job title and company — are enforced here exactly as they are on the hosted page.
- Confirmation: after submit, the embedded flow shows its own confirmation state rather than navigating your whole page away.